
The user of Android-based smartphones increasingly more and more where this is an opportunity for developers to develop android applications. Android is an open source so it can be developed by anyone. Beside that is used to develop Android applications is an android studio, and then the question is how to install Android Studio on a computer that uses Windows 7/8/10 operating system? and What is needed for installing android studio?
Android Studio is an Integrated Development Environment (IDE) for Android Developer, it was launched on May 2013, Google I / O, Android Studio is available for free under the Apache 2.0 license. Android studio at the launch of preview phase 0.1 version used on 1 May 2013 and start the beta stage in June 2014, start stable in December 2014 with version 1.0 and the newest Android Studio version is 3.01 that was launch in November 2017, based on JetBrains ‘IDEA Intellij Software, android studio for development android available for Windows, Mac OS X and Linux as a substitute for Eclipse.
Android Studio is a software that is made by Google for Android Developers in creating and developing android apps. Android Studio offers many features that allow your development workflow to be easier and fun in one set. Android Studio is also a development of eclipse, which is developed into more complex and professional.

Before you can start Android application development, the first step is to configure your computer system to act as a development platform. This involves a number of steps that consist of installing the Java Development Kit (JDK) and the Android Studio Integrated Development Environment (IDE) on your computer.
There are several things that are required to install the components needed for Android Development on Windows operating system.
System requirements
Android Application Development can be done on any of the following system types:
· Windows 2003 (32-bit or 64-bit)
· Windows Vista (32-bit or 64-bit)
· Windows 7 (32-bit or 64-bit)
· Windows 8 (32-bit or 64-bit)
· Windows 10 (32-bit or 64-bit)
· Mac OS X 10.5.8 or later (Intel-based systems only)
· Linux operation system with version 2.11 or later
· At least 2GB of RAM (4GB is preferred or more)
· 1.5GB of available disk space
Steps for installing Android Studio
1. Installing Java Development Kit (JDK )
Android Studio SDK is developed using Java or Kotlin programming language (Java is the most programming language that is used). Similarly, Android apps are also developed using Java. As a result, the Java Development Kit (JDK) is the first component to be installed.
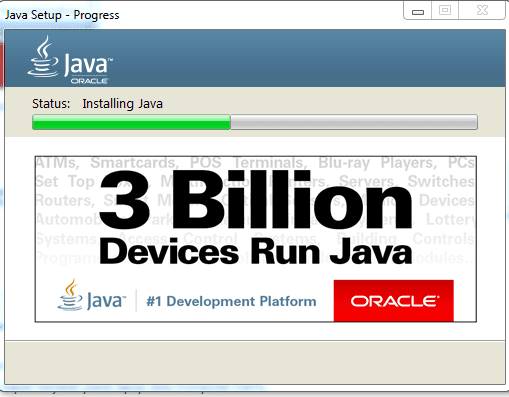
For Windows Operating System, JDK can be gotten from the Oracle Corporation website via this following URL:
http://www.oracle.com/technetwork/java/javase/downloads/index.html
2. Download AndroidStudio
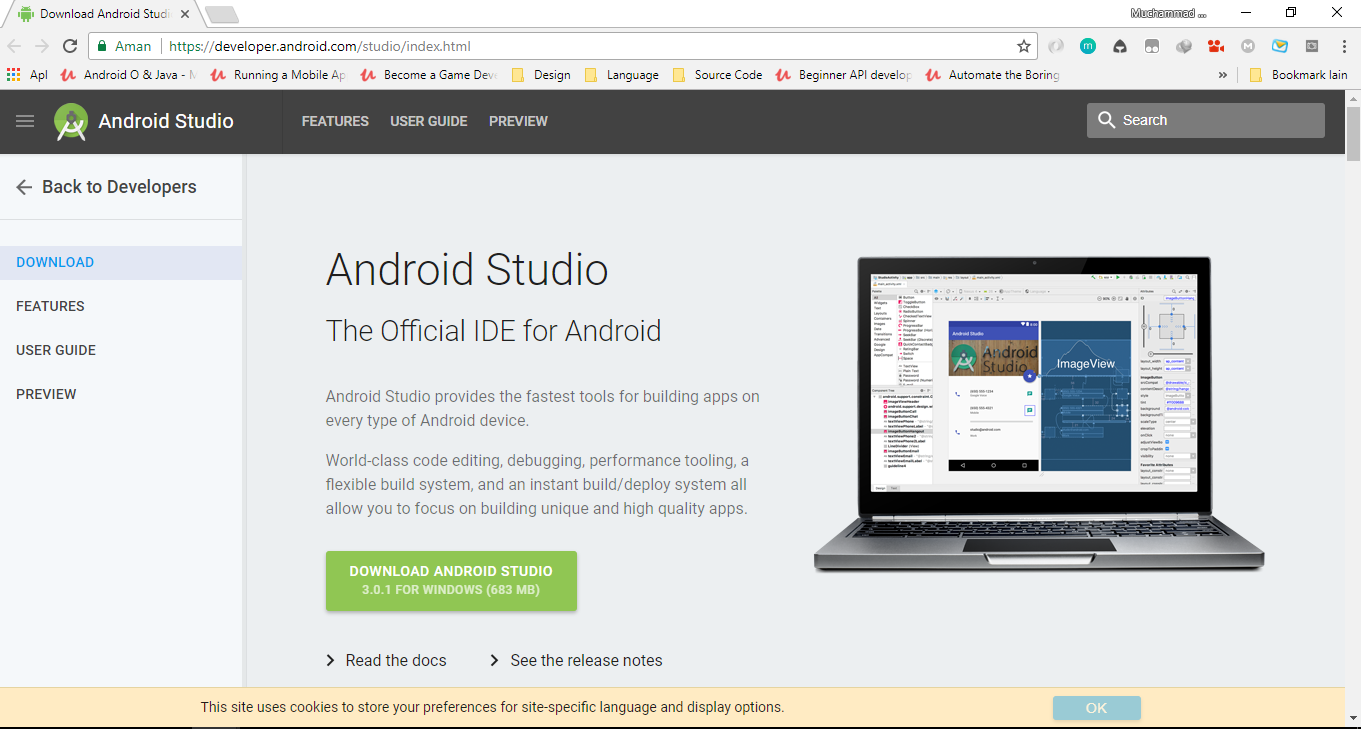
Most of the jobs that are involved in developing apps for Android will be done by using the Android Studio. You can download Android Studio from the following web pages:
http://developer.android.com/sdk/index.html
From that page, please click on Download Android Studio for Windows button. On the next screen, you will accept the terms and conditions before to start the download.
3. Install Android Studio
After you already finished downloading, looking the file of Android Studio installation and double–click to start the installation process, click the Yes button in User Account Control dialog, if it appears – click on ‘Next’ button. and then the page will appear as below:
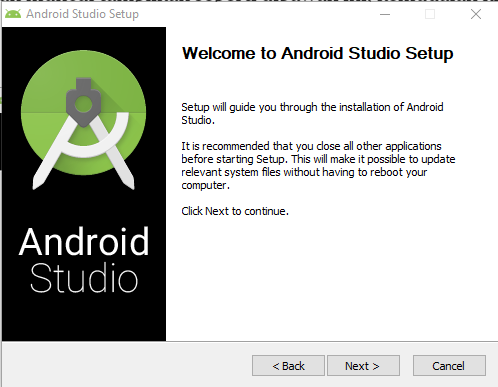
Then the display will appear like below, then click the ‘Next’ button,
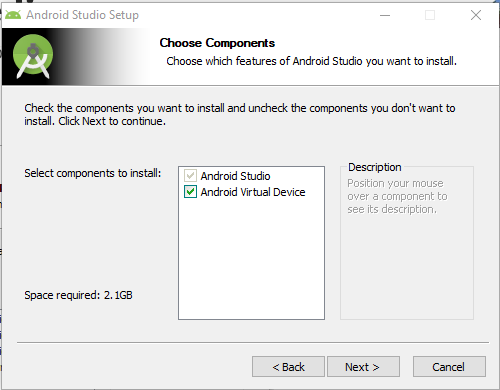
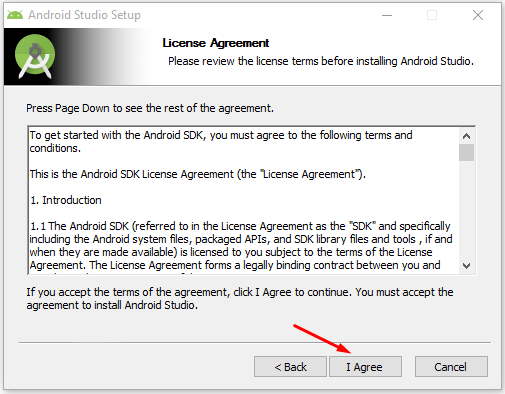
Next, The next screen is the license agreement. If you agree, click on the “I Agree” button.
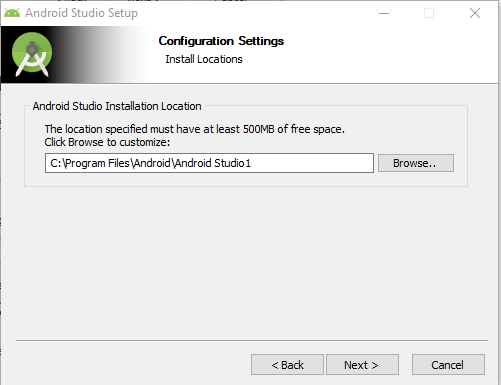
 Next, below is the Configuration settings screen, it shows all the installation paths that will be displayed. click the ‘Next’ button to continue.
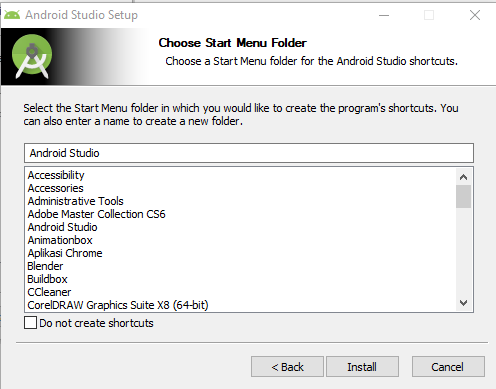
The next screen is for creating a shortcut on start menu – let that setting become the default and click on ‘Install’ button.
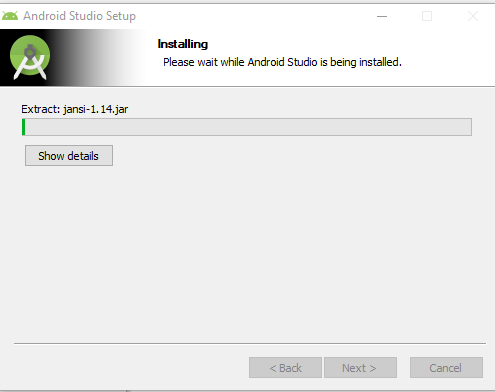
And Android’s Installation will start – and please wait for the installation to be complete.
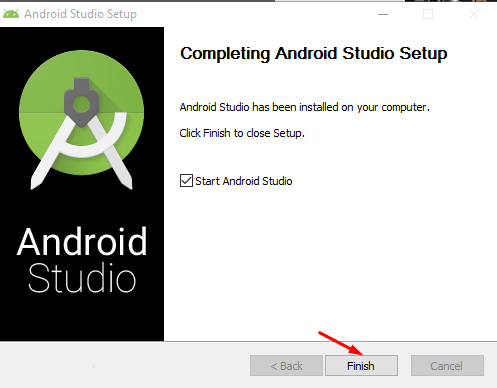
After the installation has been finished, then the screen as below will appear. Click the ‘Next’ button, and then it will go to the finish page. – Click the Finish button.
When Android Studio launches after installation, a dialog will appear providing options to import settings from an earlier version of Android Studio. If you have settings from previous versions and want to import them into the latest installations, select the appropriate option and location Or you do not need to import previous settings.
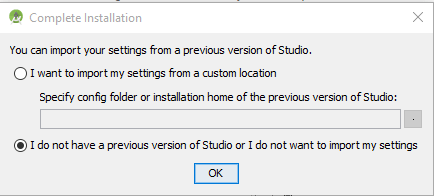
The way to Install Android Studio on Windows 7 8 10 – If you’re the first time to install Android Studio before. Select “I do not have a previous version of Android Studio or I do not want to import my settings” and click the OK button to continue.
Next, Android Studio is preparing to launch.

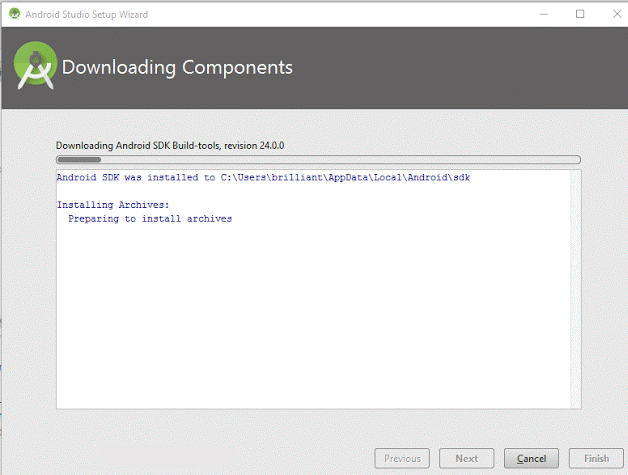
And you will be directed to the next page to download and install the Android SDK tools component. Make sure your computer is connected to the Internet. Please wait for the download and install Android SDK tools to complete.
After the download process and the component’s installation has been completed. Click the finish button.
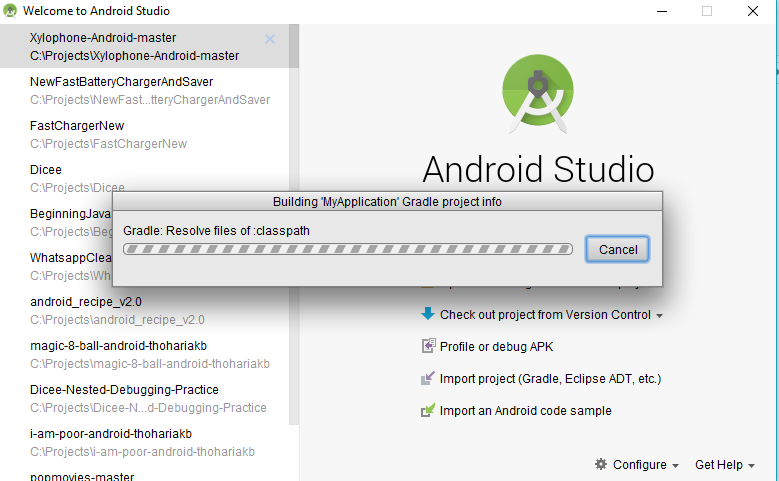
And then Android Studio has been finished the setup process. You will be seen the Android Studio welcome screen that is appearing.
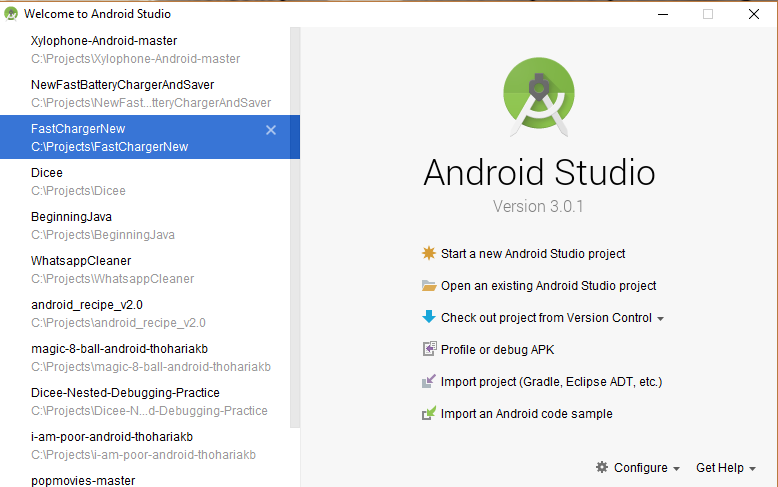
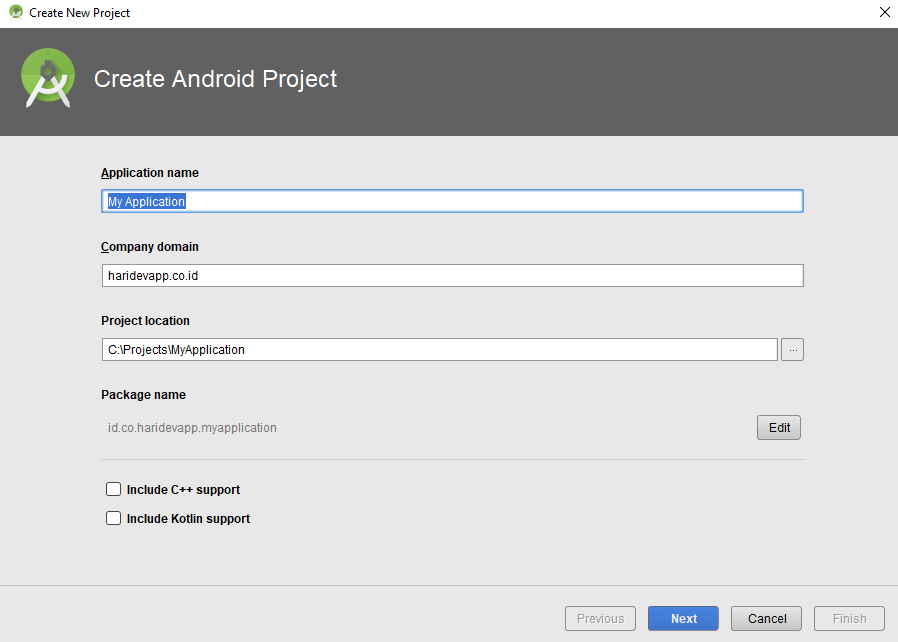
From the “Welcome to Android Studio” page, select “Start a new Android Studio Project” to start creating apps in Android Studio, then you will be taken to the screen below. You can rename the app if you want and select next.
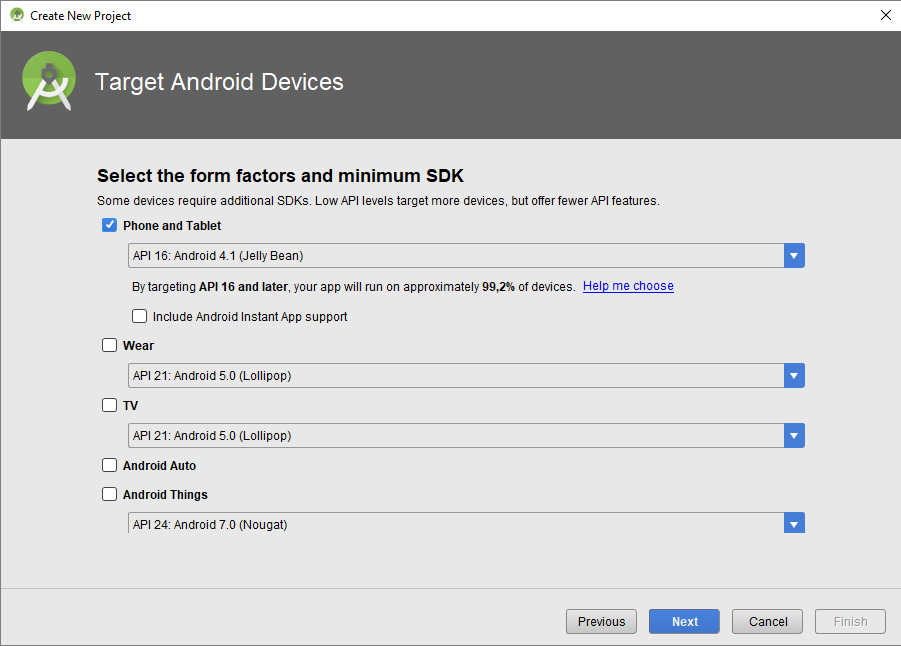
 Next, you will be asked to choose the minimal version of android you created. Please choose one, I choose Jelly Bean, then select Next.
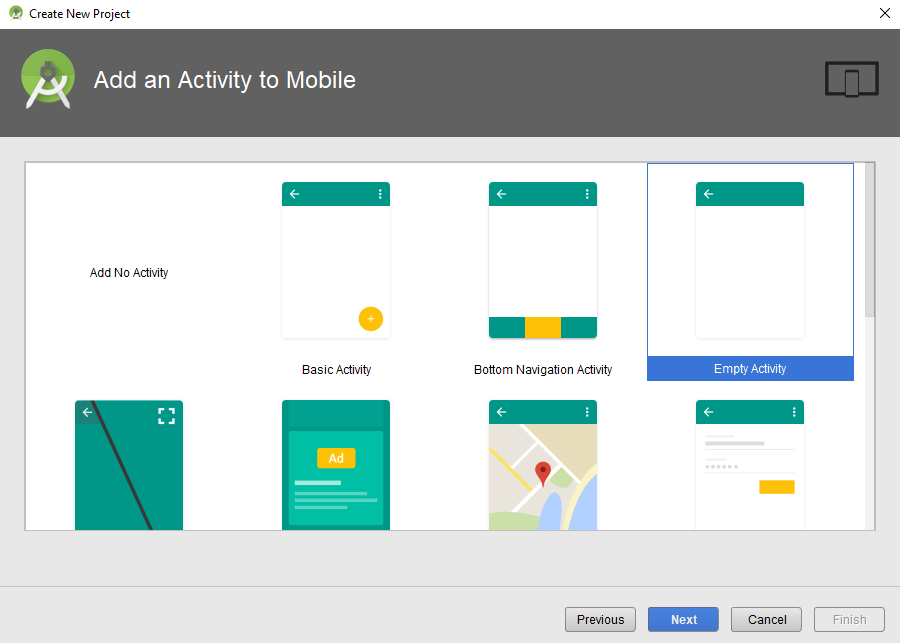
The next screen is adding an activity, choose one and here I choose an empty activity and choose Next.
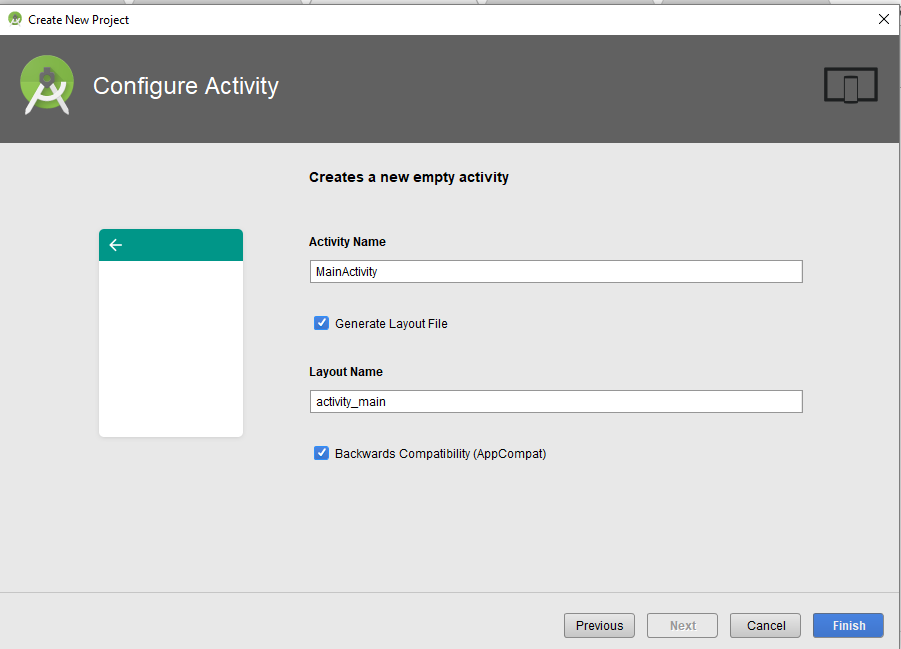
Next, you will see the Activity’s configure page, just select Next.
The next process is creating the project, please wait until the process is finished.
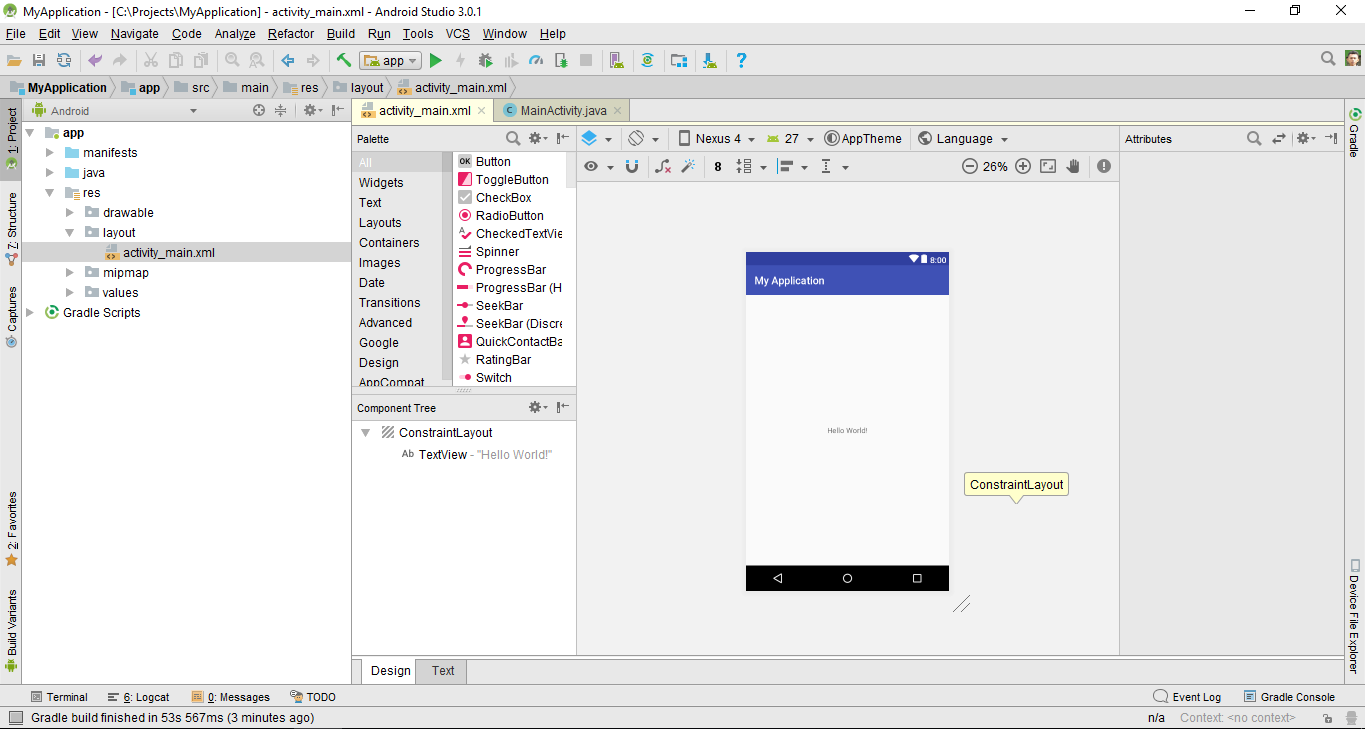
If the process has been completed, then the android studio page will be as below.
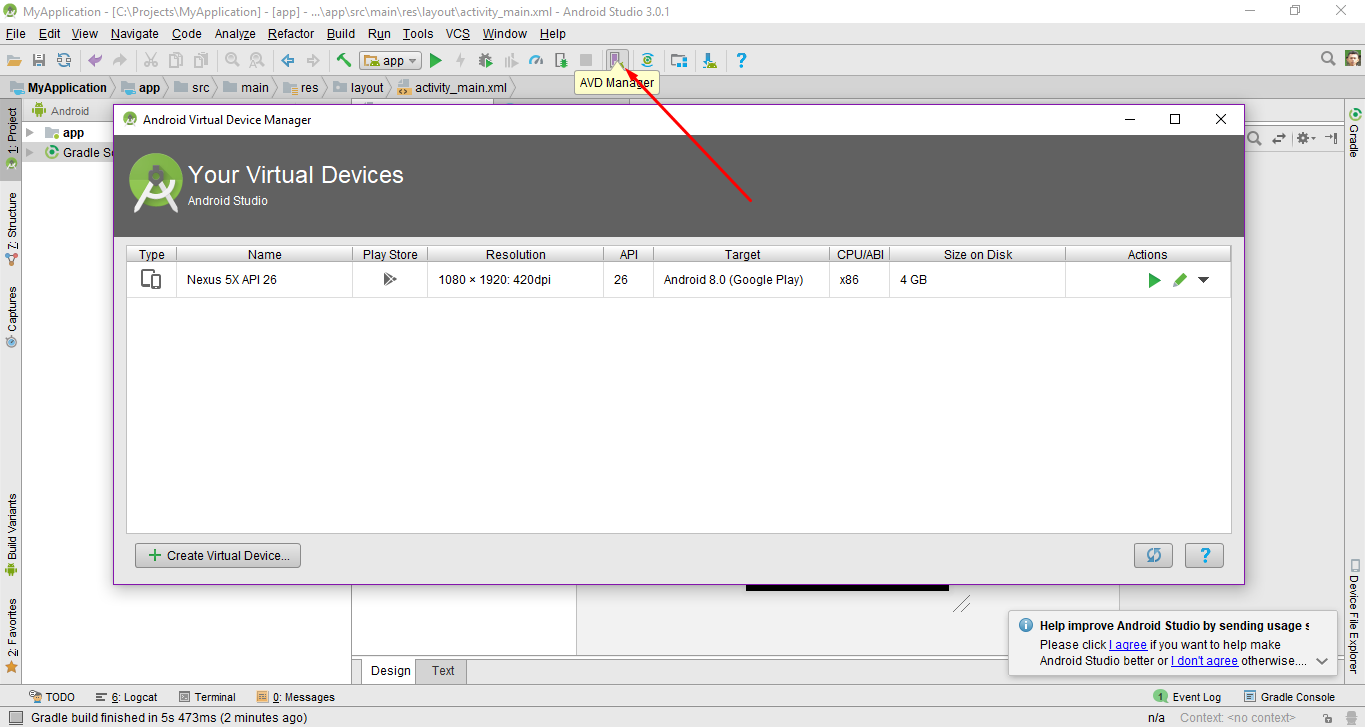
And now before we jump into any programming, let’s talk about how to get this app running and say “Hello world!”. You can create Android Virtual Device (AVD) to run your project first.
You can create a new AVD instance using the AVD manager and provide the details asked. after that, you can run that app on Android Virtual Device.
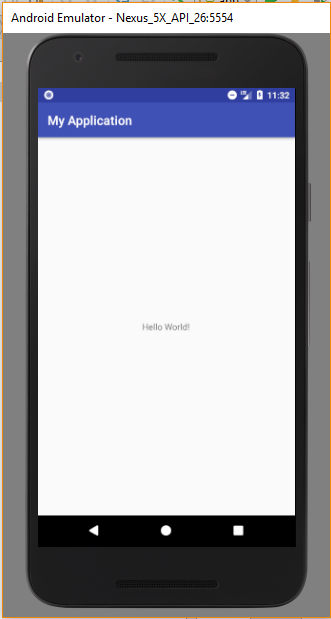
Congratulations, you have created your first project. This is the process of installing Android Studio on windows, good luck in practicing it. Thank you 😊